Friday, March 20, 2009

Dingo Mk. III Scout Car Miniart 35077 review

Dingo Mk. III Scout Car Miniart 35077

Download the HQ-Image


The "Dingo" in detail
It would be an absurd and pointless to compare this model with the older Tamiya, so let us assume that this is the first model produced by the vehicle and leave it at that ...!

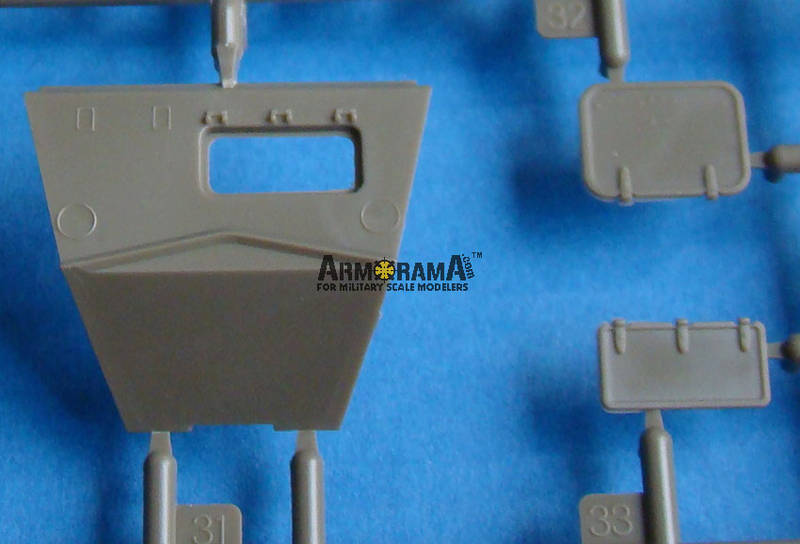
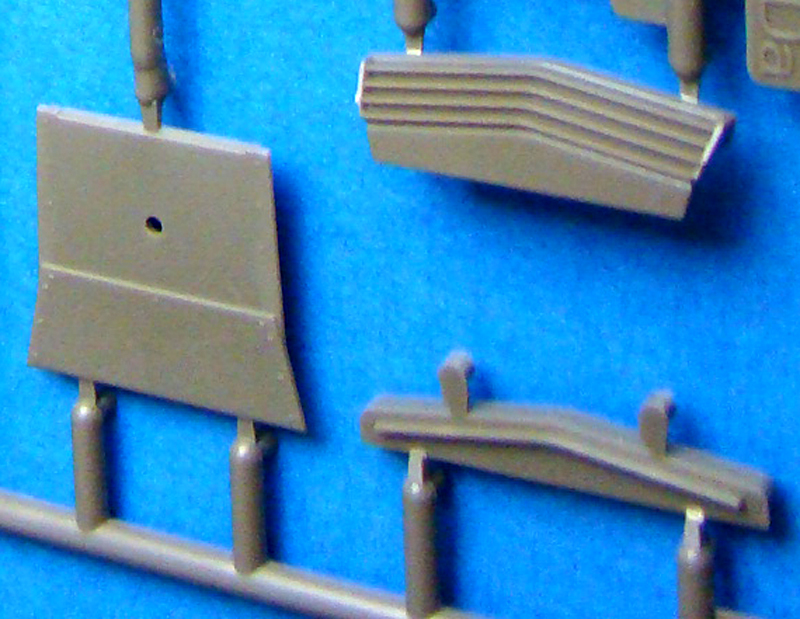
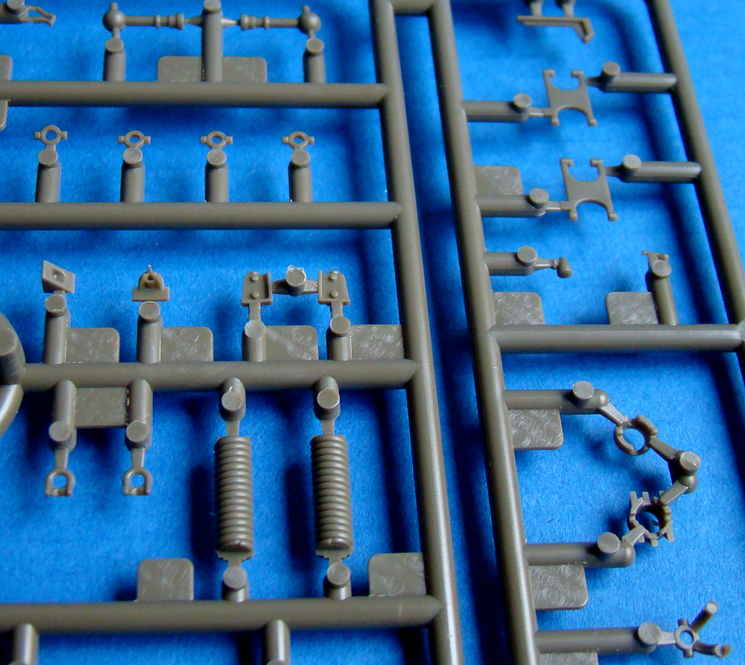
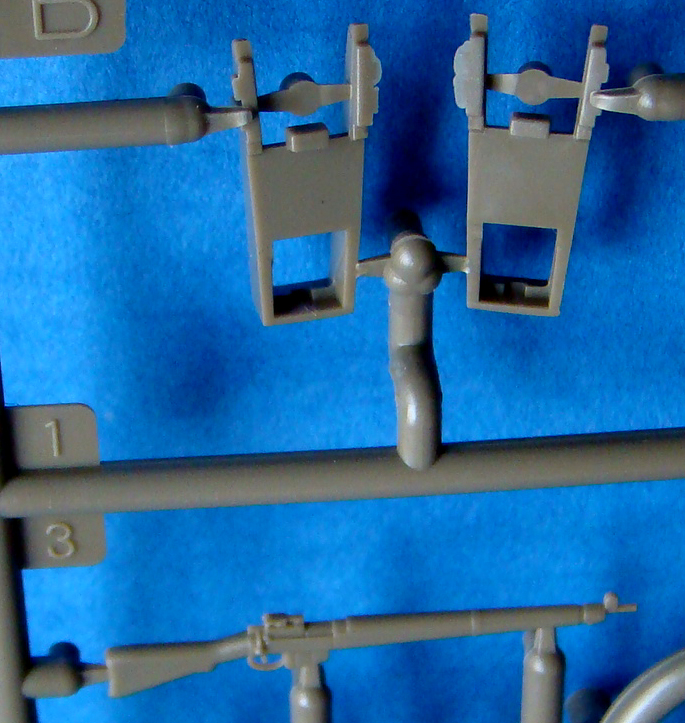
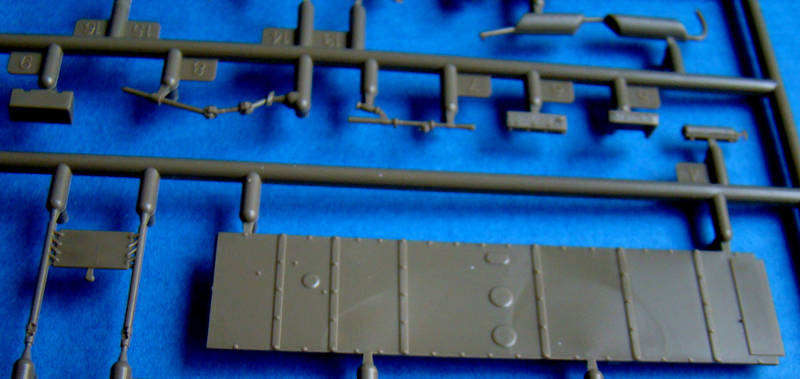
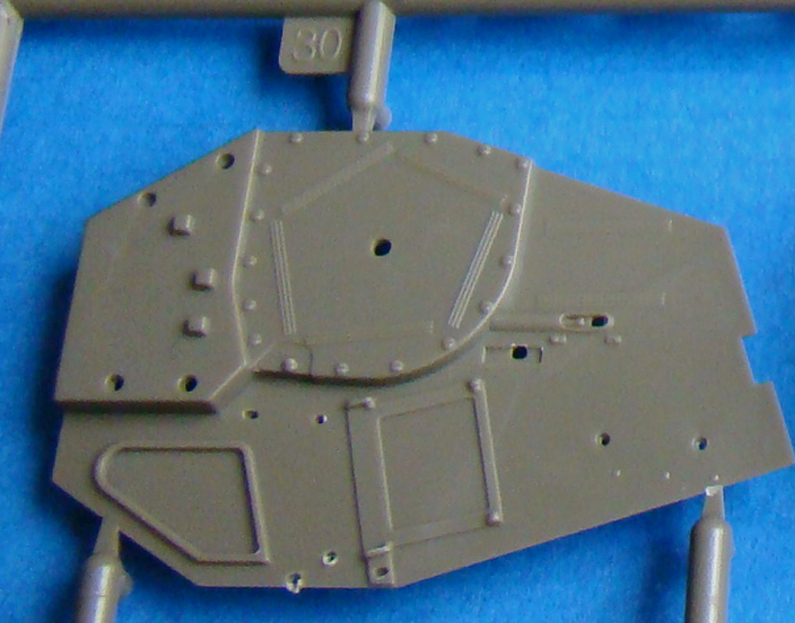
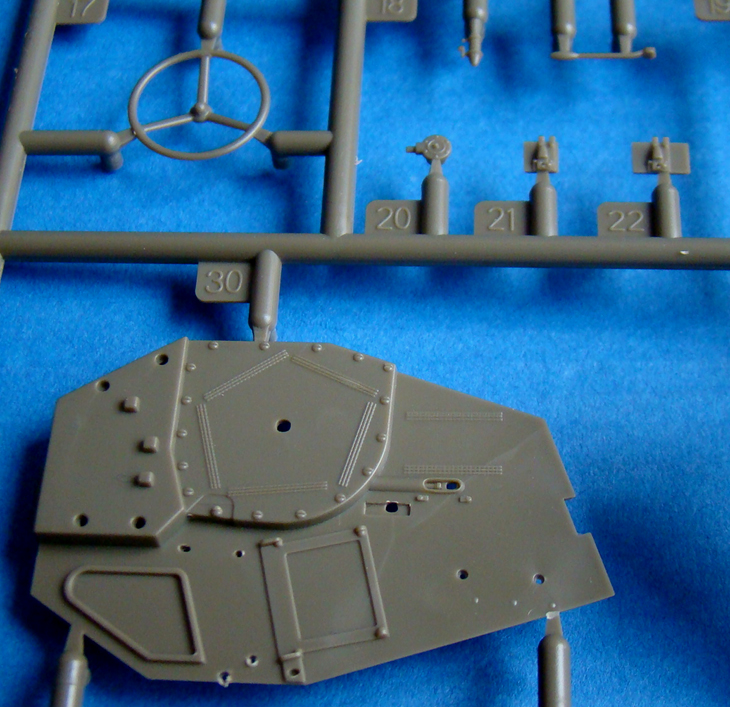
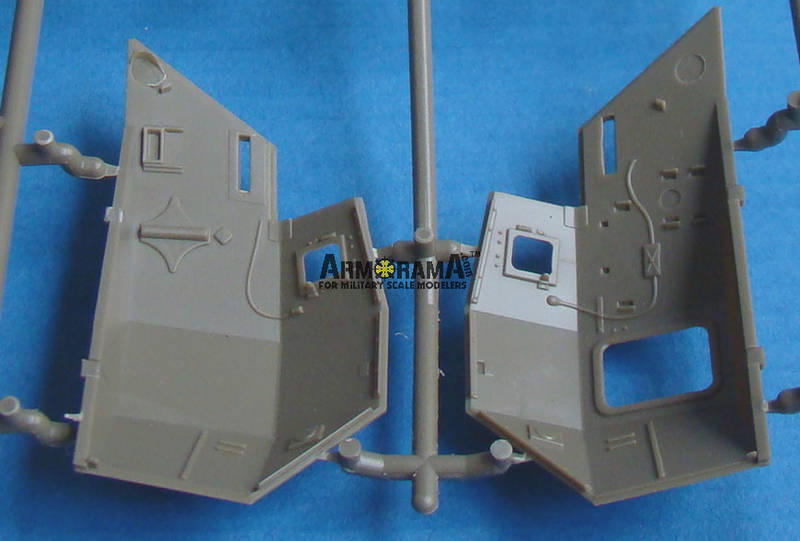
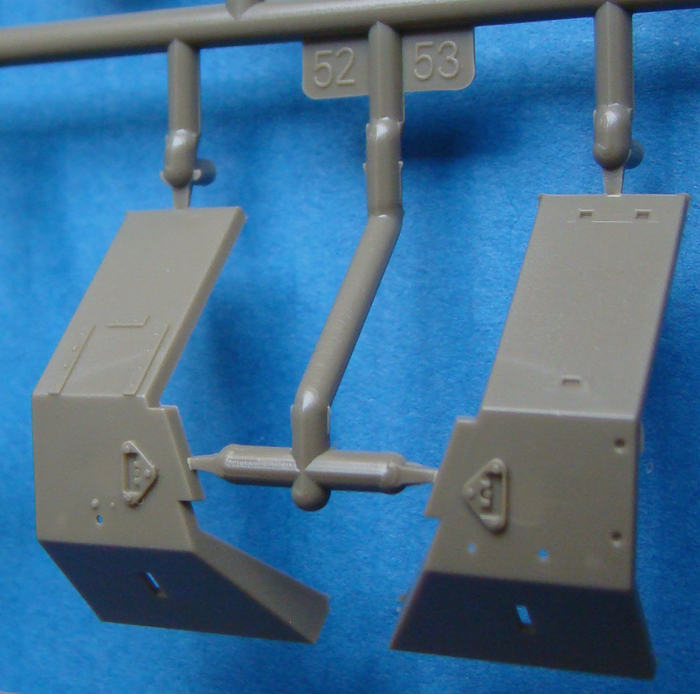
The first thing to think about the sprues, as many parts. The dingo was probably one of the smallest (armored) vehicles of World War II, and it is amazing how many parts have been considered necessary to reproduce. This is partly due to the fact that it is an open-top vehicle, and not with a full interior would be counter-productive. The other problem, if the modeler must be reasonable (as if we are not) is the thickness of the walls of the crew one. Looking at it from different angles, they look good and give an impression of scale. Brief produce them in photo-etch (with added entertainment value of the bend to the right angle) the designer has done an excellent job.

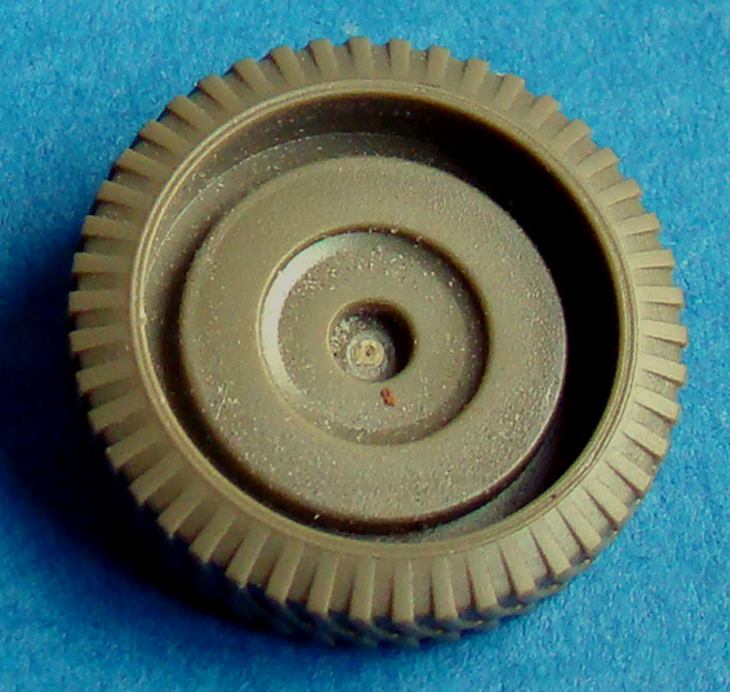
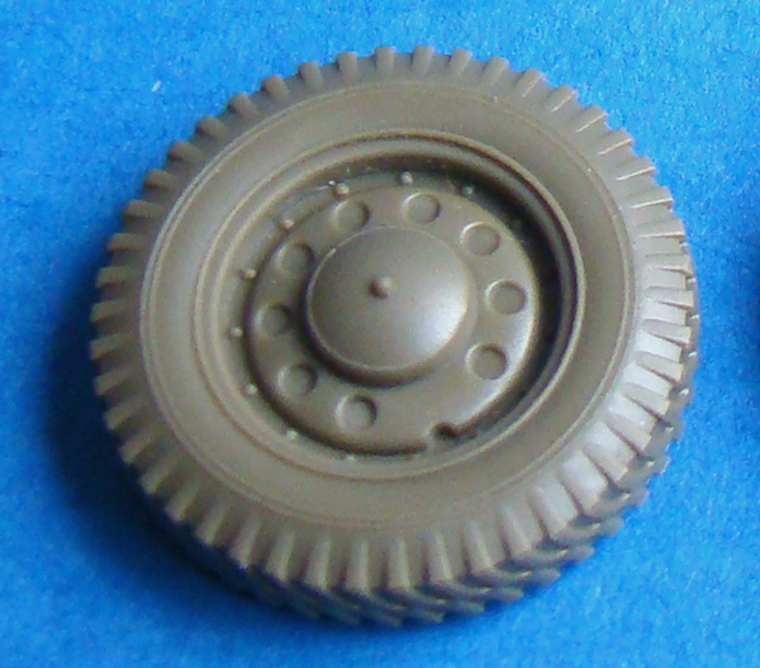
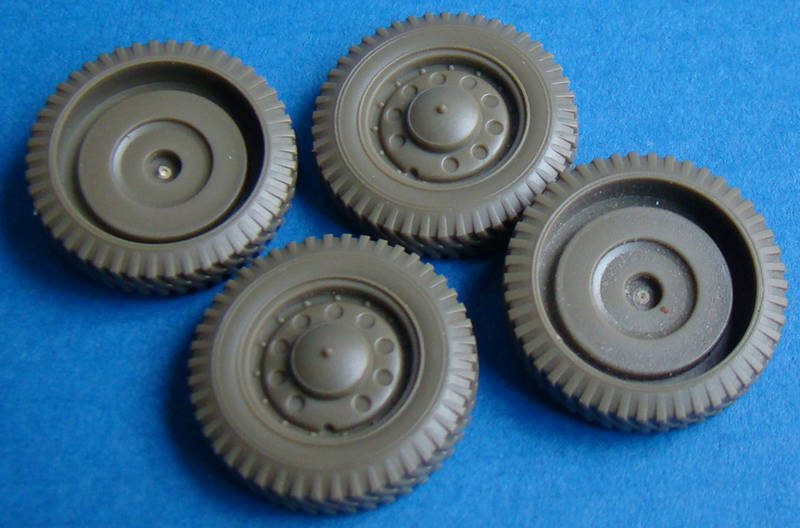
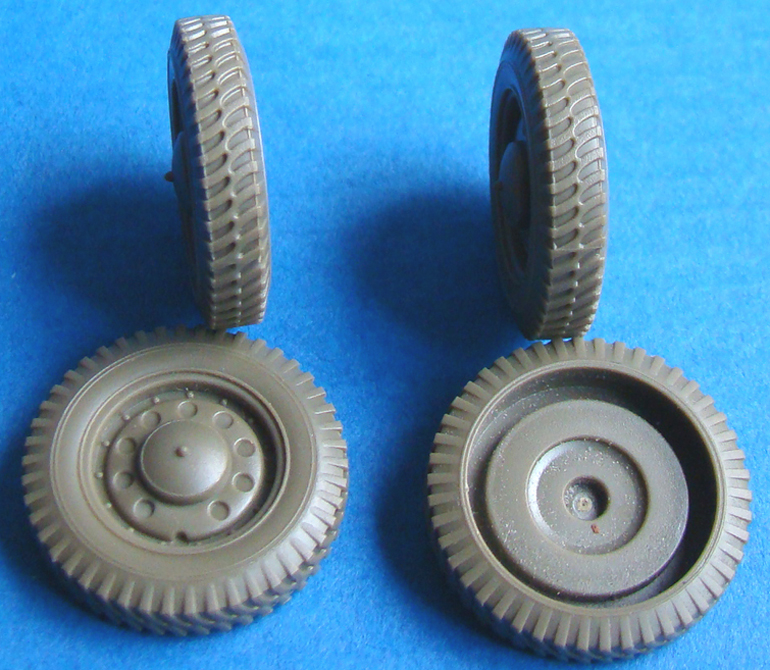
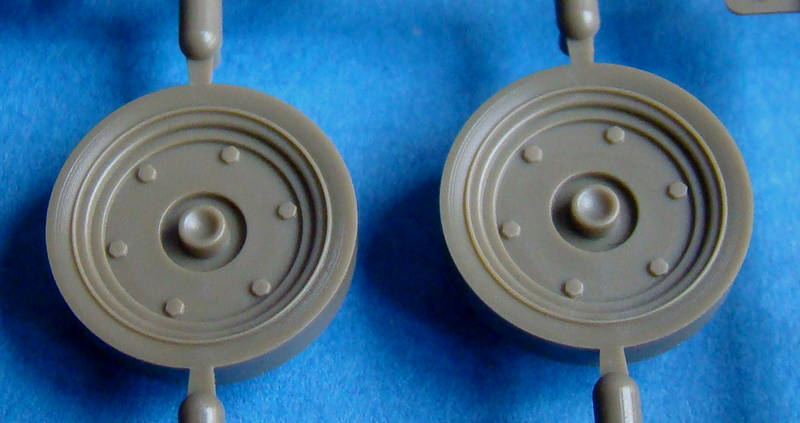
Another well thought out was in the design of the wheels. The tread pattern is perfectly reproduced, and each wheel is a piece of molding system, which avoids damage to the tread and problems with orientation. Each wheel is equipped with a separate application for the hub on the axle on this page.
>
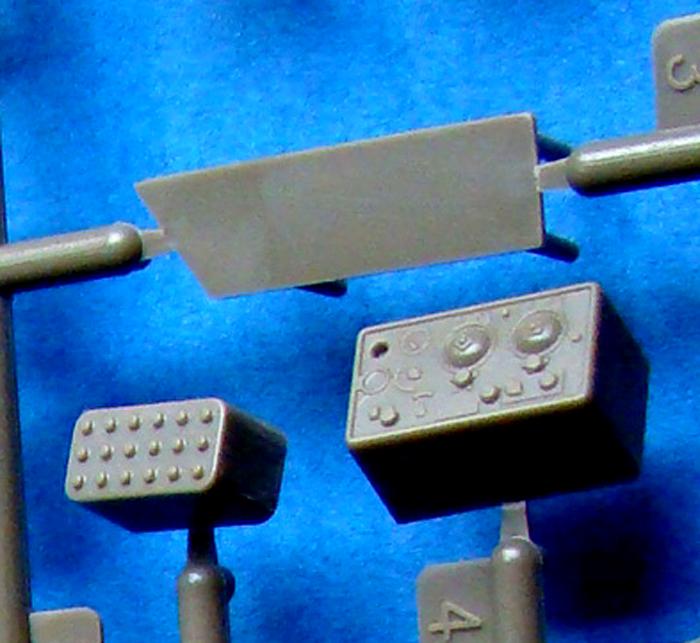
With regard to the internal details for a moment, everything is as it should be. The N º 19 radio is done well, with his battery, and the seats are very nicely detailed and the debate on the design of the originals. The Super Detailer may want additional cabling to areas such as the radio (the protective "cage" in the PE-leaf) and the wiring inside the building, but apart from that, pretty much everything is there.

The hatch in the fuselage are finely made, although there is a very thin film of flash-round, they need careful cleaning.

The suspension, it is for those who dislike complex constructions - Good News! - Suspension of Dingo is pretty simple. The big spring shock absorber is also a little more attention, because in my eyes, the coils are a little too close together. Not every kind of problem - a few minutes with a file should arrange it. The N º 19 aerial mount is well done, as well as the distinctive "British" fire extinguishers. Side lights and main lights, etc. are excellent reproductions of the originals - again, the company has done its homework on the little details.

I have only superficial measurements with my own plans, but from what I can tell, there are no glaring errors in the angles and dimensions.

With the subtlety of some of the smaller parts, real care must be exercised as they consider their sprues - This is a very sophisticated model, and the small pieces reflect this.

The crew figures
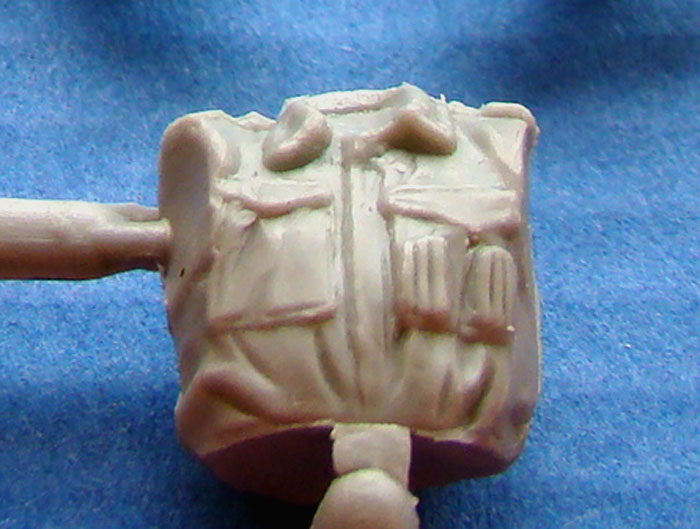
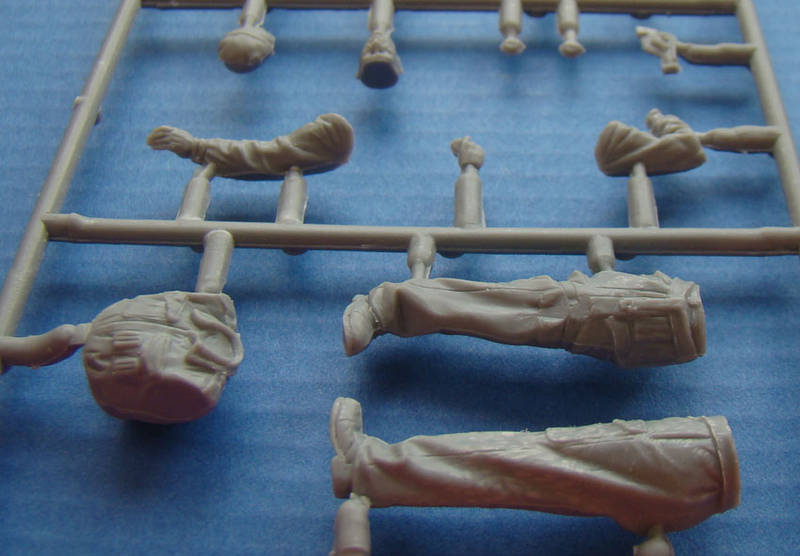
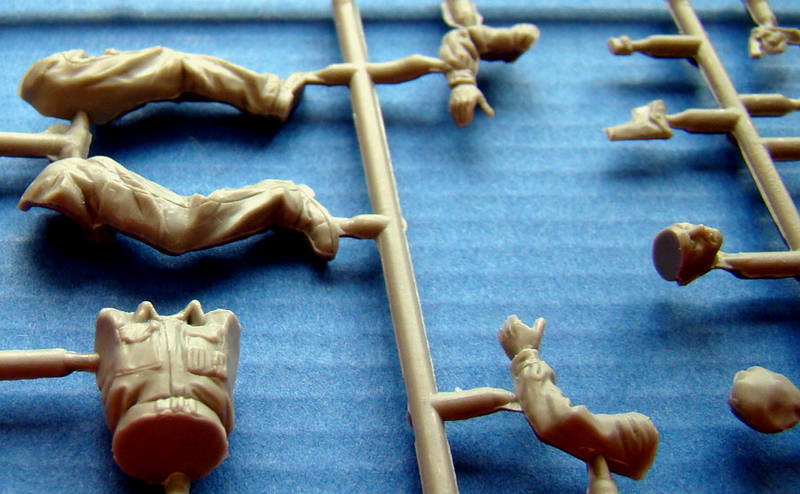
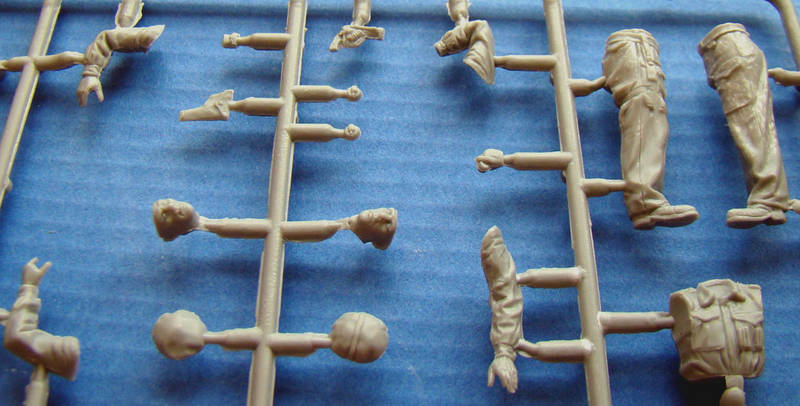
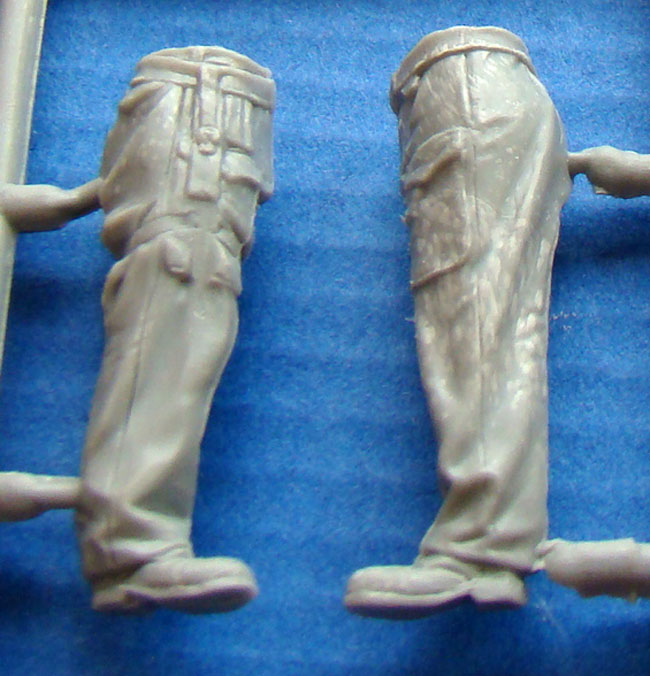
Hey! They are made MiniArt, and they are British. What more could you ask for? Well, in fairness, they are some very good numbers. Both are shown to bear the AFV Crew denim overalls. Check my references, once again, that all should be present there. A figure sits to the driver as the vehicle, the other, is the vehicle commander. Some light cleaning to eliminate some forms of lines, however, that apart from two excellent figures. Detail is crisp and right brains are good though perhaps some might want to use AM resin heads (especially to change the head-gear). In itself but a good sign for the future.


Conclusions
MiniArt, like all major manufacturers are not following "whims". They invest in the bars and tools, which are to maximize their investments. I would expect that the Italian Lince in the future along with the Mk.1 / 2 in the German service.

Once again, the long wait was worth it. This is an excellent model of a very common vehicle was in service for more than 30 years. The quality of the forms of the superlative is not in the "Shake 'n Bake" class, it is in a superb model with some basic modeling skills. Although I miss the gate, about what I had was enough for me to say that MiniArt have some serious work on this set, which is in sales - that earned in large quantities.

Finally, once again my thanks to the team of MiniArt Ltd for this network can be one of the first at this excellent model!
march2009_013a march2009_014 march2009_015 march2009_016 march2009_017 dingo-010 dingo_011b dingo_011c dingo_011d dingo_013 dingo_014 dingo_016 dingo_023 dingo_017 dingo_017a dingo_018 dingo_019 dingo_015a dingo_010a dingo_021 dingo-008 dingo_024 dingo_025</span>


Read more...

Tuesday, March 17, 2009

Masterbox announced aircraft 1/32 produce line

Master Box
Masterbox Ltd have only the "official" information, which is particularly welcome that you, the big aircraft issues.

The company, which has an excellent reputation in 1/35th scale military topics are the pages in the aviation market.

Currently they are working on both flight crew and ground staff in 1/32nd-scale - an area that has unfortunately not in injection-molded styrene.

The list they have published is the following:

1 / 32 Scale. Military Miniatures

- 3201 Air Force flight and maintenance personnel

- 3202 U.S. Air Force flight and maintenance personnel

- 3203 Royal Air Force flight and maintenance personnel

- 3204 Imperial Japanese Air Force flight and maintenance personnel

- 3205 Soviet Air Force flight and maintenance personnel

In addition Masterbox have announced that they are in the planes with the following themes - in 1/35th scale

- 3568 Horsa MK 1 troop-contributing with an umbrella. Model numbers of the British paratroopers with this record.

- 3583 Horsa MK 1 troop-contributing with an umbrella. This model is consistent with the numbers of American paratroopers.

- 3584 Douglas C-47 Skytrain. This model is consistent with the numbers of U.S. aircraft and maintenance personnel and U.S. paratroopers.

- 3585 Douglas C-47. In British and Commonwealth Service, the C47 Dakota. This model is consistent with the numbers of British aircraft and maintenance personnel and the British paratroopers.

- 3587 German military cargo aircraft Junkers Ju-52. Affectionately as "Aunt Ju" by the German troops. Also in this series are the numbers of German aircraft, maintenance personnel and the German paratroops.


Read more...

Tuesday, November 18, 2008

Long-awaited U.S. Bantam Jeep are IN SALE in 1/35 scale Miniart 35014

What did you said, you will ask?! Yes!!!
US BANTAM JEEP Miniart 35014 1/35 ARE IN SALE!!!!
We waited for this release for a long long time.
Official date of release this model kit was an June 2008.
Miniart-models.com already in August signed Bantam Jeep as AVAILABLE but manufacturer delayed this model kit.

And now it happens! This kit come to first traders and during a month or more will be available in woldwide stores.
Let check again the model kit specifics:
Bantam Jeep kit consist of 152 parts, this model contains the jeep vehicle along with five figures. This five figures was taken from stan alone model kit 35047 - US Jeep Crew.
This is the first model from any plastic manufacturer of this Bantam Jeep vehicle.

Retail Price: ~19.50 US$

THIS IS built US JEEP CREW 35047 photos:

So here is a photos of built Bantam Jeep:
This is a main mold of Jeep. As we can see form picture, this is high detailed kit.


And here is a box:


Photos was taken from www.plastic-models-store.com


Read more...

Thursday, November 6, 2008

History of Plastic modeling

The history of plastic modeling arose shortly before the Second World War, albeit in very limited form. Mass-produced plastic kits came in the period after the Second World War era, but you can not look at the history of plastic model without the long history of modeling in general, which dates from at least to ancient Egypt. Some graves contained models of cars and ships. In the history models were used to ideas and designs for recording. Before photography models rank with the art to contemporary events. In the lobby of the El Presidente Hotel in downtown Santo Domingo is a model of Santa Maria. It is 20 Century model used to illustrate the history of islands. In fact, most models from the past seem to be vessels and many are also in hand. Most warships have been built before the model ship was built. Until the mid-20th Model century was a hobby, the vast quantities of time. With the availability of mass-marketed plastic model kits and disposable incomes in the (relatively) prosperous times after the Second World War and Reconstruction in Europe and Japan, a new hobby was born: plastic kit building.

One of the main selling points was a link with history. Another was a hunger for an understanding of how different machines work. Model creates an interest in issues that will in any case from what is the color of the engine in Richard Petty's car, or what color was a F6F-5 Hellcat. Modeling allows each user a separate representation of the USS Constitution, or to keep Darth Vader's Tie fighter.


The first plastic models were manufactured in the 1950s by the British company Frog and Airfix. American manufacturers like Revell, AMT, Monogram and won promotion in the 1960s as French Heller SA in Europe. Since the 1970s, Japanese firms such as Hasegawa and Tamiya have dominated the field and represent the highest state of the art. Brands from Russia, Central Europe, China and Korea have also prominent recently. Many smaller companies also have plastic models.

During the injection-molding is the predominant manufacturing process for plastic models, the high cost of equipment and tools make it unsuitable for lower-income production. For example, models of small and obscure subjects are often produced using alternative methods. Vacuum Forming is popular for aircraft models, although assembly is more difficult than for injection molded parts kits. Resin-casting, popular with smaller manufacturers, especially "aftermarket" companies (but also producers of full kits) yields a greater degree of detail formed in situ, but as the forms used not so long, the price for this Kits is much higher. In recent times, the latest releases from major manufacturers offer unprecedented detail, this is a game for the best resin kits, which are often also high-quality mixed-media (photo-etched brass, turned aluminum) parts.


Read more...

Tuesday, November 27, 2007

Order of multiple paint coats

Question
I'm trying to get the smoothest finish possible - not necessarily the glossiest. In other words, I HATE orangepeel! After I apply a color coat, I'm not about the correct sequence of (a) clearcoat, (b) sand (c) colorcoat. IOW, once I cover the model with color, should I use any additional color coats? Or just multiple clearcoats with sanding in between? And if I use more color coats, should I sand EVERY coat? Or just the clears? Or just the colors? Many thanks for the trouble you take to answer our question! Tom

Answer

The best (smoothest) finish should be obtained by applying a good color coat first. After that has dried well you can Polish out any irregularities with fine grit sand paper (2000, 3200, something of that order.). If additional coats are needed you can apply them lightly afterwards. I would wait for clear coat until the finish is blemish free. If you are using gloss paint for the color coats make sure that the coats are thoroughly dry between coats. Sometimes that might take a day or two. A trick that a friend uses for his funny car models is to use finger nail polish as it dries very smooth.

I have managed to get fairly smooth finishes by polishing the surface prior to my first coat and building up the paint in light layers. I also sometimes use flat paints and a final gloss coat. That usually results in a smooth finish. There really is not a science to good paint finish, it is more of an art that each person develops on their own.


Read more...

Thursday, November 15, 2007

How to get great effects custom painting plastic models

How to get great effects custom painting plastic models?

Two cheap way's to get very good results on model cars is to go to the cheap shops ($2 dollar ones) and check out the nail polish ..amazing colours huge range and at $2 dollars its cheap, looks great and holds its colour..also a product by "pentel pens" called "metallic brush" fantastic pen brushes ..self contained pump fed water based metallic paint in about 12 colours take covering with enamel clear top coat @$8.00 at good papershops /stationers and both of these items will last for a vast number of projects and will keep for years

Depending on What you are trying to do, you can use an Air Brush, Painting masks, and painting templates. IF you are a Military Modeler Dry brushing is what works the best for mud Streaks and splashes, Oil runs, Rust spots with runs down, exhaust streaks. The list of things that can be done is almost endless. The Best answer is Practice, lots of practice, and patience. :)


Read more...

Wednesday, November 7, 2007

How to remove chrome parts from model car

In previous post I wrote How to remove chrome from plated parts and How to remove paint from your models.
Today we will talk about another method of removing chrome parts from car model!
Ever wonder why kit makers seem to chrome some of the strangest parts? Everything from distributors to oil pans make it into the plating bath. If you are building a trailer queen show car, great, but if you prefer to detail your kits with a more practical look, here's how to remove that pesky chrome in no time.

You should do some steps:

  1. Know that not all plating is created equally. Depending on the manufacturer, the stripping process can take a few minutes or a few hours, which is generally no sweat since you will be building that 426 Hemi while waiting for the valve covers to de-chrome
  2. Get an airtight container, such as a prescription bottle.
  3. Get the chemical for stripping the chrome. Easy-Off oven cleaner can work, but it does have a weird smell, so many prefer chlorine bleach, found in the laundry aisle of your local retailer. Get the cheap stuff, it has no added fragrances and seems to work better for this purpose.
  4. Pour enough bleach into the container to cover the parts. Usually about an inch or so will do the trick.
  5. Drop the parts into the bleach and place the lid on securely. Here's where the airtight part comes in. Since most plastic parts float in bleach, shake the container a little to insure tha parts are covered.
  6. Take a look after about an hour. If the chrome is hanging tough, replace the lid and wait another hour. If the parts are still shiny after that, leave them in the bleach overnight.
  7. Once the parts are dechromed, recover them using tweasers. Place them in a container of fresh water to soak. After 30 min. replace the water and allow them to soak another 30 min.
  8. Be sure and dump your container.
Helpful advices:
  • If you can get your hands on a small strainer or wire basket, it will help in the rinsing process. Just be careful when rinsing under the tap. Plugging the sink is a good idea, unless you really want to test your plumbing skills by trying to fish out a 1:25 scale carb from the J trap.
  • Use lukewarm water to rinse. It takes the bleach off faster than cold.
Warning! Be attentive:
  • Bleach is dangerous if handled improperly. Protect your eyes and skin.
  • Rinse all tools and containers after use with bleach and do not use soap of any kind when rinsing. This will cause the bleach to gas off and the results can be harmful.
  • Clearly label your stripping container and never leave it in the reach of children. Using a child resistant container (pill bottle) will help but "child resistant" isn't child proof, so be safe and put the container out of reach of children.
  • Again, protect your eyes, skin and clothing. Work around the sink to help contain possible spills.


Read more...